

part 1: uploading an image header
open up blogger. go to layout >> header, edit >> upload image.

you should be able to see your image once it's uploaded. you can adjust the blog title placements as needed before saving. i prefer not to have text, so i chose "instead of title and description".
hit SAVE and you're done!
part 2: centering your image header
once you've got your header uploaded it will be defaulted to the left, looking like the image below. for some bloggers (like me) i prefer my title to be on the side. but most others want their header image to be centered, for obvious reasons.

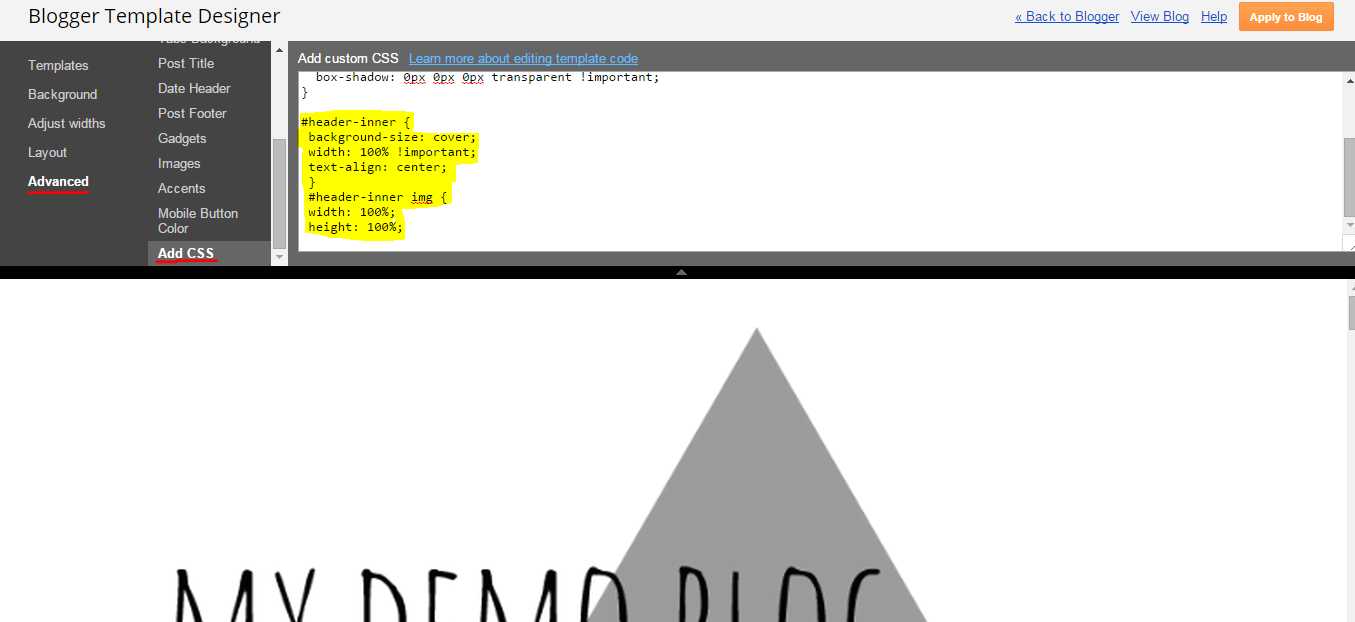
to fix this, you need to go into your blogger template >> customize >>advanced >> add CSS. copy and paste the text below to the CSS box, press the ENTER key and then APPLY TO BLOG.
if you'd like your image to be full width, use this css instead
i hope this helped. but if you have any questions, just comment and ask!

Love this! This is something I really struggled with when I first started blogging, on Blogger.
ReplyDelete